Once you’ve crafted a captivating map using Maply, you might wish to feature it on your website, blog, or other digital platforms. The embedding process is remarkably straightforward with Maply.
Prior to embedding a map, ensure it’s published publicly, providing read-only access to all viewers.
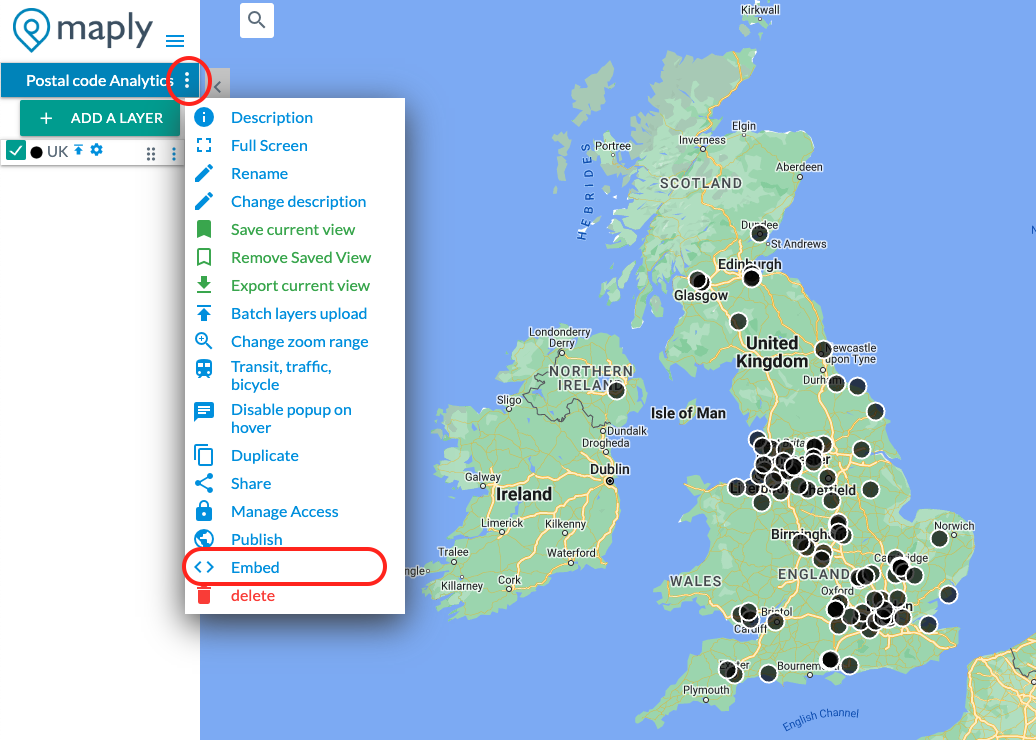
Upon publishing, locate the three-dot icon adjacent to the map title, where you’ll find the “Embed” option as illustrated below.
Select the “Embed” option, triggering a popup that displays a two-line code. This code can be inserted into your website or other platforms like Notion.

There are options to include or exclude the menu panel, the search box, the map style selector, full screen button, map legend, navigation controls, Pegman for street view, and the “Near Me” button. To have a clean map, you may uncheck everything. Otherwise, you may select the elements you would like to show in the embedded map.
Pro Tip
The dimensions of the map are adjustable. For instance, you can modify the width and height as shown below.
width=’100%’ height=’550′
Important Note
Embedded maps require an active Maply PRO or Max subscription. They will become unavailable once the subscription expires. Visitors to your website trying to access your map will see a screen like below.
